| Travel With Request Help |
Areas that wish to travel together to camp should use the Travel With feature. In order for areas to travel together, each area must
have a trip with the same first, second and third choice camp and week options.
At the request of the
Camp Allocation Committee,
combined Travel With requests may not exceed 114 spots (2 buses). Use the Comment field to request a Travel With larger than 114 spots.
|
|
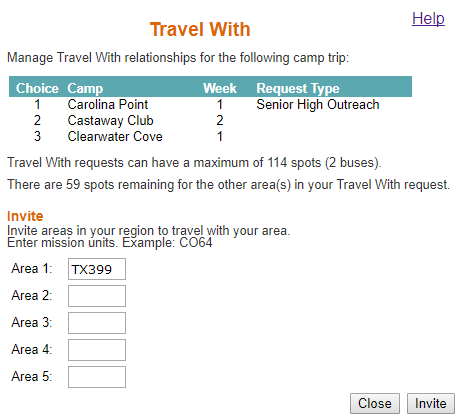
Invite an Area to Travel With Your Area
|
- Enter and save your camp trip request.
-
On that trip, click the Invite button in the Travel With column.

-
In the Travel With pop-up box:
-
Enter the area number(s) of the area(s) you wish to invite.
You may enter up to five different areas in your region.
-
Click the Invite button.
|
|
-
On your trip request, the Invite button will change to a Status button. The invited area(s) will have a Pending Travel With
notification when they login to the camp requests website. The invited area(s) will have the option to accept or decline your
Travel With invitation.

|
|
Respond to a Travel With Invitation
|
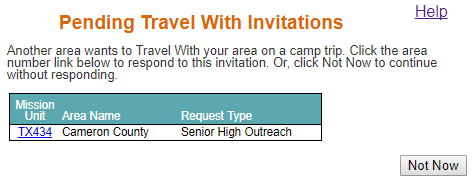
If another area has invited your area to travel with them, you will have a Pending Travel With invitation when you login to your Area Request.
-
Click the mission unit number to accept or decline the request. (Click Not Now to come back to the request at another time.)
|
|
-
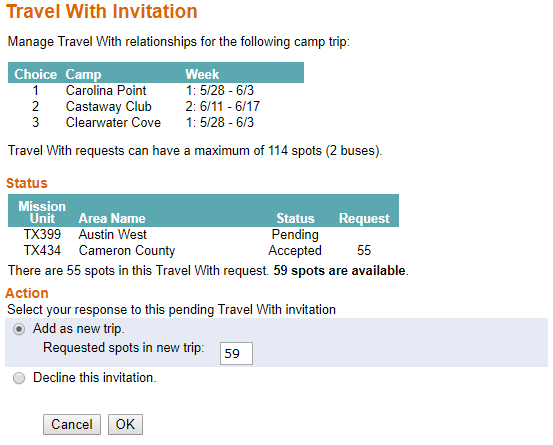
The Travel With Invitation will display the trip choices of the area that extended the invitation and the status of all areas
involved in the Travel With. Remember that in order for areas to travel together they must have a trip with the same camp and
week for the first, second and third choices.
-
To accept the travel with invitation, select Add as new trip, enter the number of spots for your area, click OK.
This will create a new trip for your area.
-
To decline the invitation, select Decline this invitation, then click OK.
|
|
|
|
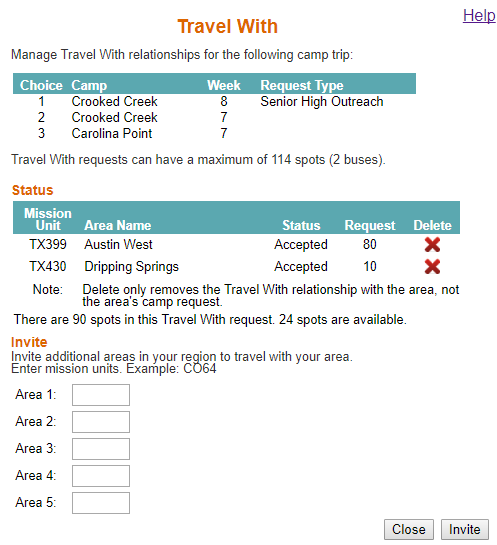
Delete or Modify an Existing Travel With
|
-
Click the Travel With Status button to display the Travel With pop-up box.

-
To invite additional areas, enter the area numbers then click the Invite button.
-
To delete an area from the travel with, click the red X then click the Close button.
NOTE: This does not delete the area trip, it only removes the area from the travel with relationship.
|
|